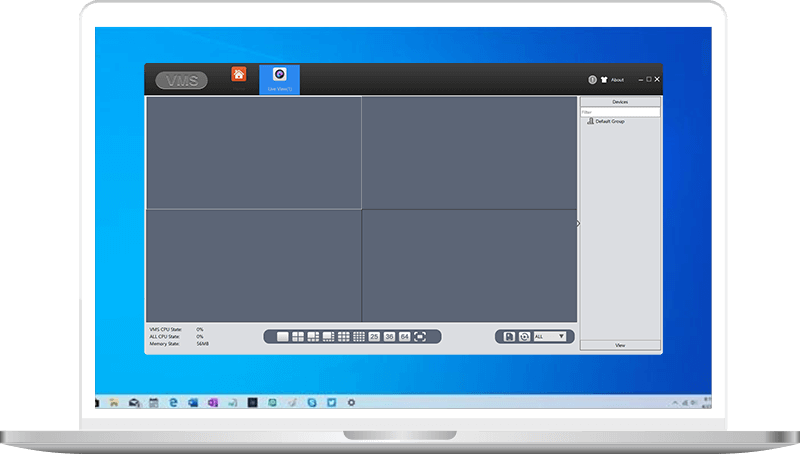
 | VMS software for monitoring cameras WINDOWS MAC OS |
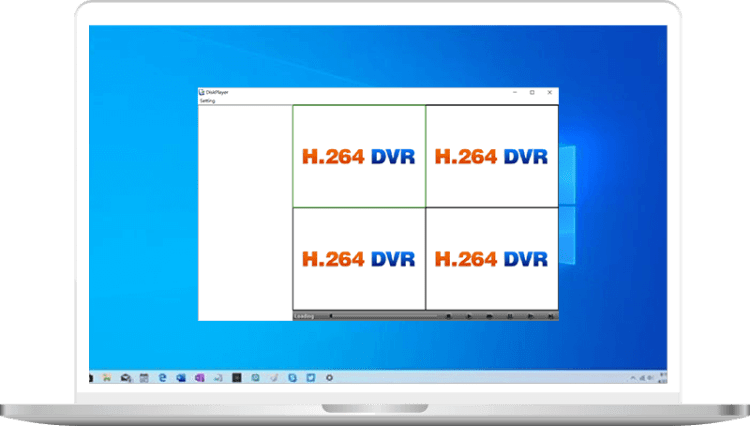 | Diskplayer software for playing downloaded recordings from cameras STIAHNUŤ |
IMPORTANT:
Turn off antivirus protection and firewalls in Windows Security.
Make sure the DVR system is connected to your router with an Ethernet cable. You can check the status of your network connection using the Startup Wizard.
Add the DVR system to the client
Option 1: Add DVR system automatically
Make sure the DVR system and your computer are connected to the same router.
Step 1:
Log in to the client with the default username (admin) and password (admin).
Step 2:
Click OK to automatically add the DVR system.

Step 3:
Tap YES on the “This operation may modify the device´s IP adress, whether to continue?” pop-up window.
Step 4:
The DVR you added will appear in the Device Manager interface after 10 seconds of searching..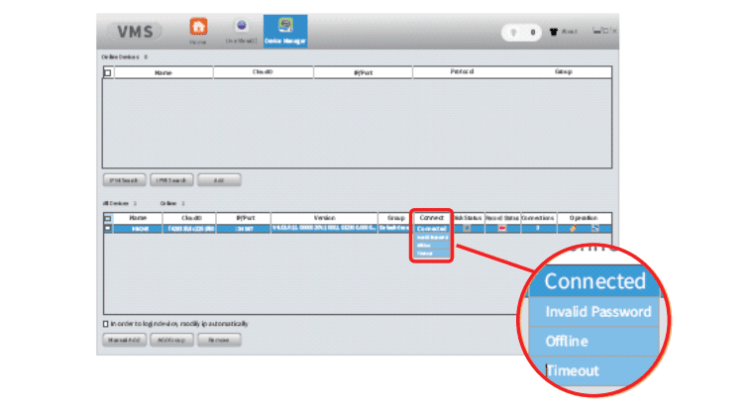
Invalid Password:
The VMS client cannot automatically load the DVR system password, you must modify it by clicking.
Connected:
The DVR system is ready for use.
Offline:
Check that the DVR system and the computer are connected to the same router.
Time out:
The network may be disconnected, please![]() click refresh.
click refresh.
Option 2: Add the DVR system manually
Step 1:
Click Manually Add in the lower left corner of the Device Manager interface.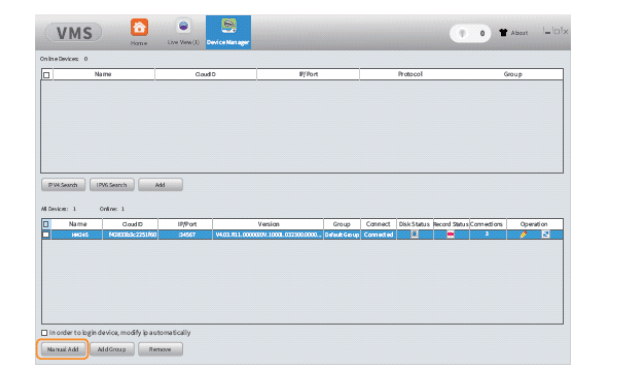
Step 2: Change the login type from IP to CloudID and enter the required information in the Add Device interface.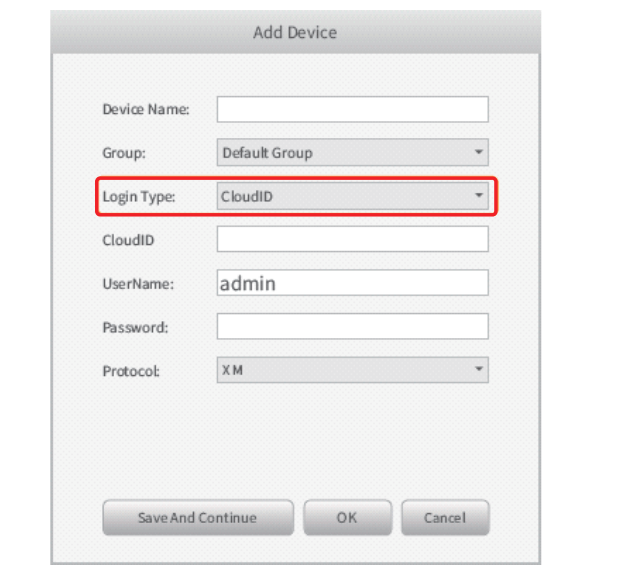
Device Name:
Set a name for the DVR.
CLOUD ID:
Also called serial number. You can get it from the Run Wizard or by selecting System > Version.
Password:
Enter the password you set for the DVR system.
Live video
Click Home > Live View to view live videos from all channels.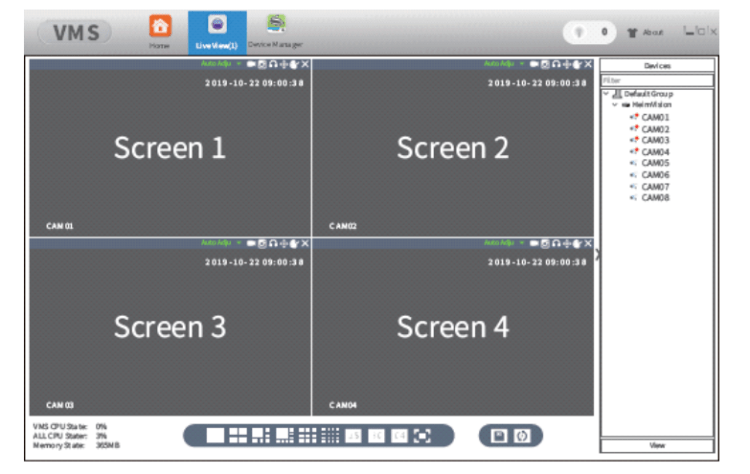
- Click to select a screen (the selected one will be marked with a white border), then double click to select one channel from the Hiseeu list, the live video from the channel will be displayed on the selected screen.
- For example, select Screen 1 and CAM02, the live video from CAM02 will be displayed on Screen 1.
- Double-click on one screen to view the channel in full-screen mode, double-click again to exit full-screen mode.
Video recording
You can go to Home > OPERATION > Recording Settings to set the disk where the video will be saved for the VMS client.
Go to Home > ADVANCE > Upload Schedule to set a detailed upload schedule.
Notes:
- To save videos to your PC’s Disk, you must always log in to the VMS Client.
- Choose D:/ to save videos in case of lack of disk space and abnormal situation of your PC.
- The PC disc is not intended for viewing, and long-term recording may damage the disc.
- If using a VMS client for video recording is essential, it is recommended to use a dedicated server and hard drive for viewing.
Video playback
Click Home > Playback to check all uploaded videos.
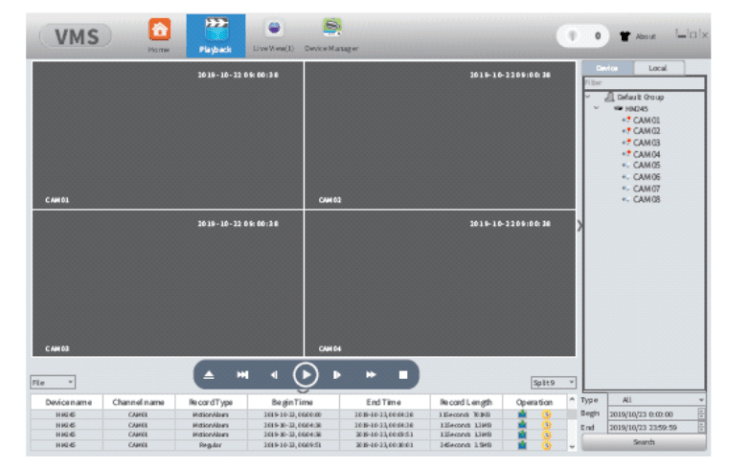
Check the box in front of the channels you prefer, select the Video Type, select the start and end time, then click the Search button to display a list of filtered videos.
Double-click the selected video files to play the video, or select one video file and then click the![]() button to play the video.
button to play the video.
Video Download (Backup)
Stay on the video playback interface and click the button![]() to download the selected video, while clicking
to download the selected video, while clicking ![]() to download the selected video, while clicking to download the video fragment according to the time period in this video file. The downloaded tile will be saved to the default path on your computer.
to download the selected video, while clicking to download the video fragment according to the time period in this video file. The downloaded tile will be saved to the default path on your computer.
To edit the path, go to Home > SETTINGS > System Configuration.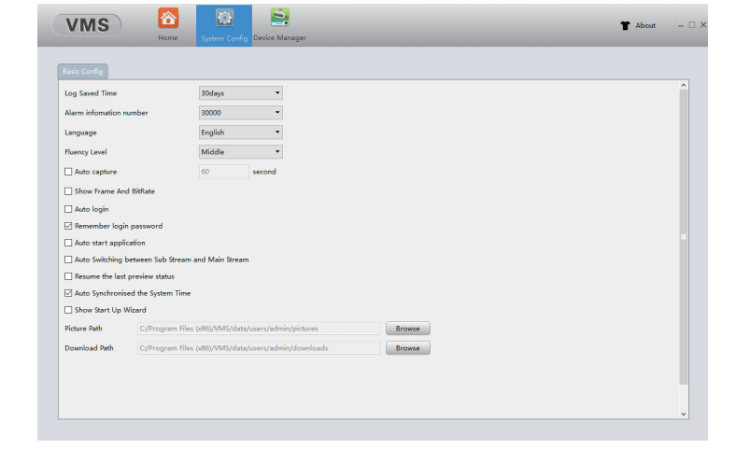
The file format you downloaded is H264 and the file is encrypted. It can only be played in the exclusive media player.

